

Table of Contents
- What a Construction Site Safety Audit Covers and Why It Matters
- Planning the Audit: Scope, Objectives and Schedule
- Pre-Audit Document Review and Preparing Your Checklist
- Carrying Out the Site Walkthrough and Hazard Identification
- Inspecting Equipment, Tools, Facilities and Interviewing Workers
- Scoring Findings, Writing the Audit Report and Tracking Corrective Actions
- Following the Construction Safety Audit Procedure From Start to Finish
- Booking Your Team's Site-Ready Workwear After the Audit
- Frequently Asked Questions
What a Construction Site Safety Audit Covers and Why It Matters
A construction site safety audit is a planned, systematic check of how work is done on site, carried out as a structured part of your wider safety management. It looks at people, equipment, premises and paperwork to find hazards before someone gets hurt.
Audits matter because construction remains one of the riskier sectors to work in.
Here is what a typical audit covers:
- Site set-up: access routes, welfare facilities, emergency exits and signage
- Work activities: working at height, lifting, excavation and hot work
- Plant and equipment: cranes, scaffolds, hand tools and PPE condition
- Worker competence: training records, induction and supervision
- Documentation: risk assessments, method statements and permits to work
Regular construction site safety audits also help control costs. Fixing a loose guard rail costs little. Dealing with an incident after a fall from height costs far more, in money, time and reputation.
Watch out: an audit that only ticks boxes can give false comfort. If the checklist is never updated and nobody walks the site, the audit records what people expected to see, not what is actually happening.
This guide follows the audit from planning through to closing out corrective actions, so you can run an audit that produces findings your team will act on.
Planning the Audit: Scope, Objectives and Schedule
Good planning decides whether an audit is useful. Start by agreeing what the audit is for: general site compliance, a specific high-risk activity such as demolition, or a subcontractor's performance.
Next, define the scope. Be specific about:
- Areas: which zones, levels or phases of the site are included
- Activities: which work is being observed, such as groundworks or roofing
- Parties: the principal contractor, subcontractors and any agency staff
- Time frame: the date, shift and duration of the audit
Set a schedule that fits the site. Routine audits are often monthly for high-risk sites and less frequent for low-risk ones. Add extra audits when work changes, such as a new crane lift or a phase that starts at height.
Assign a lead auditor with the right competence and authority, time to prepare and the power to stop unsafe work. A common mistake is giving the audit to someone with no site experience and no time to do it properly.
Keep in mind that high-visibility clothing requirements apply to visitors too. Make sure everyone on the audit team knows what they must wear before they step onto the site. Our UK construction high-visibility guidance covers the standards that apply.
Pre-Audit Document Review and Preparing Your Checklist
Before you walk the site, read the paperwork: site-specific risk assessments, method statements, the construction phase plan, training records, equipment inspection certificates and any previous audit reports. When paperwork leaves uncertainty about whether planned controls match the work, conduct risk assessments against the tasks and site conditions before the audit moves on.
Note the open actions from last time. Check whether they were closed and whether the fix held. This shows whether the site learns from its findings or just repeats them.
Next, build or update your checklist. A standardised checklist keeps audits consistent between sites and between auditors. Organise it by work activity rather than by a generic list of rules, because workers relate to tasks more than to clauses.
| Work activity | What to check | Evidence to record |
|---|---|---|
| Working at height | Edge protection complete with guard rail and toe board; scaffold tags in date; harness inspected and worn correctly; openings covered and marked | Photo of any gap, tag number, harness inspection date |
| Excavation | Shoring or battering in place; spoil kept back from the edge; underground services located and marked; access and egress provided | Depth, location, service drawings referenced |
| Lifting operations | Lift plan available and followed; operator and slinger certificates in date; exclusion zone maintained; pre-use checks recorded | Certificate numbers, lift plan reference, photo of exclusion zone |
| Electrical work | Isolation and lock-off applied; cables and plugs undamaged; RCD protection in place; competent person identified | Isolation certificate, test record, photo of distribution board |
| Hot work | Permit to work issued; fire extinguisher nearby; area cleared of combustibles; fire watch in place during and after | Permit number, extinguisher service date |
| Plant and vehicles | Operator competence; segregation from pedestrians; reversing controls; pre-use inspection records | Inspection sheet, photo of segregation |
| Welfare facilities | Clean drinking water; washing facilities; somewhere safe to eat; toilets clean and stocked | Photo and note of any shortfall |
| Housekeeping and access | Routes clear; materials stored safely; waste removed; lighting adequate | Photo of blocked route or trip hazard |
Make the criteria clear enough that two auditors would score the same thing the same way. Vague items such as "site is tidy" produce inconsistent results. Ask whether each item describes what you would see, hear or read if the control were working.
Many teams now use digital audit tools that work offline and sync later, which helps on sites with poor signal and makes attaching photos to findings easier.
Watch out: a checklist copied from another site without adjustment can miss the risks that matter here, such as a particular excavation or a temporary works scheme, so tailor the items to the actual work before you arrive.
Carrying Out the Site Walkthrough and Hazard Identification
The walkthrough is where your preparation meets reality. Walk the site with the site manager or a supervisor, but spend time alone with the work when you can. People behave differently when they know the auditor is watching, so look for normal working as well as the stated procedure.
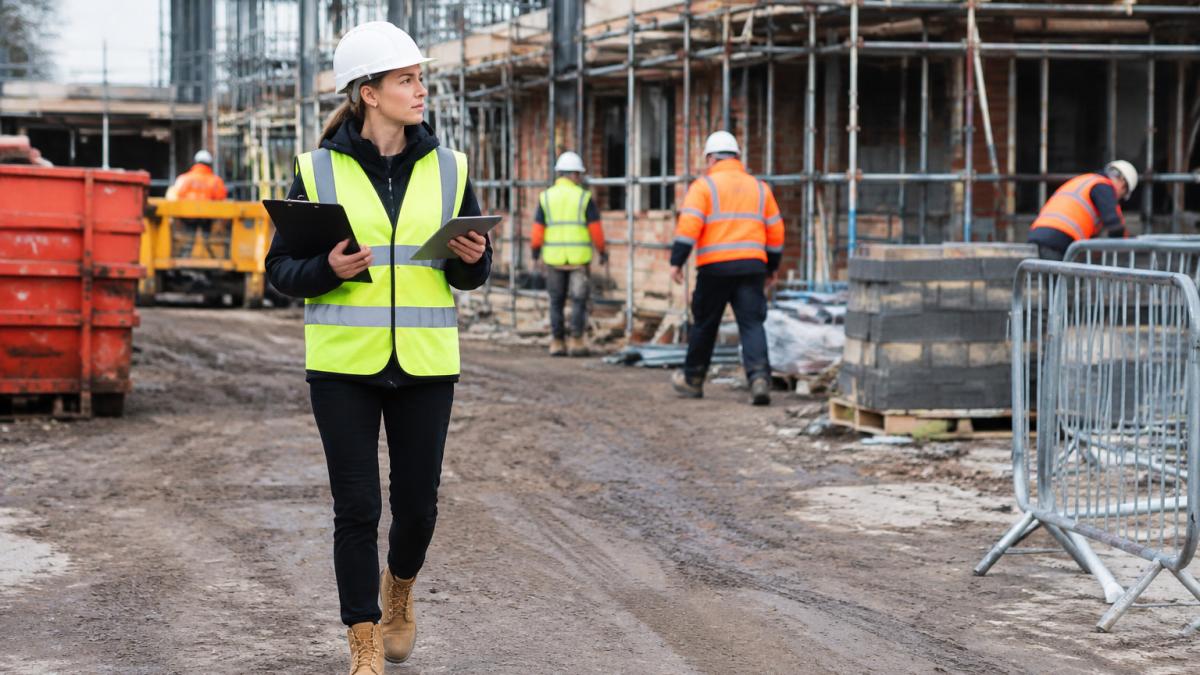
As you walk, identify hazards in three ways:
- Look at access routes, housekeeping, guarding and the condition of equipment
- Ask workers what they are doing and what might go wrong
- Observe tasks for how they are actually carried out, not how the method statement says
Record each hazard with a short description, its location and a photo where it helps. Describe what you saw, not what you assume. "Gap of about 600mm in edge protection on the third-floor slab, north side" is far more useful than "fall risk".
Check the controls too. A guard that is in place but missing a toe board still needs a finding. Note whether the control was designed well, installed correctly and maintained.
Then move on. Do not spend the whole walkthrough on one problem. A balanced audit covers the whole site, including quiet areas such as welfare facilities and storage.
Inspecting Equipment, Tools, Facilities and Interviewing Workers
Equipment and facilities are the physical side of the audit. Inspect scaffolds for tags and secure fixings. Check hand tools for damage, cables for cuts and guards for security. Check welfare facilities for cleanliness, drinking water and somewhere safe to eat (Workplace facilities - What you must provide).
Pro RTX High Visibility Waistcoat →
Look at personal protective equipment as well. You can see a high-visibility waistcoat that meets the standard for comparison. Our safety boot and PPE standards guidance explains what to look for in footwear and other protective clothing.

Interviews matter just as much.
Interview subcontractors too. Many incidents happen where responsibility is unclear between firms, so check that subcontractors understand the site rules and their own duties.
Scoring Findings, Writing the Audit Report and Tracking Corrective Actions
Scoring turns observations into priorities. Rate each finding by likelihood and severity, usually on a simple scale such as low, medium or high.
One common approach is to score likelihood from 1 (unlikely) to 3 (likely) and severity from 1 (minor injury or damage) to 3 (fatal or major), then multiply the two.
A worked finding record makes the method concrete. For example:
- Finding: gap of about 600mm in edge protection on the third-floor slab, north side
- Evidence: photo taken on site walkthrough, location noted
- Risk rating: likelihood 3, severity 3, score 9 (critical)
- Requirement breached: edge protection duty under the Work at Height Regulations 2005
- Action: fit guard rail and toe board to north edge of level three by Friday
- Owner: site supervisor
- Verification: follow-up inspection on Monday, photo of completed fix
Write the report while the detail is fresh. A clear report includes:
- Summary: the scope, date, auditor and overall conclusion
- Findings: each finding with location, evidence, risk rating and the requirement it breaches
- Good practice: what the site did well, so it is kept
- Actions: each corrective action with an owner and a completion deadline
Make every action specific. "Improve edge protection" is not an action. "Fit guard rail and toe board to north edge of level three by Friday, owner: site supervisor" is.
Then track actions to closure. Review open actions at the next site meeting and check that fixes are working. A follow-up inspection confirms whether the change has held.
Useful metrics include corrective-action closure time, repeat-finding rate and audit completion rate.
Watch out: a finding that is closed on paper but not verified on site can leave a serious hazard in place, so always confirm the fix with a follow-up inspection before marking an action complete.
Following the Construction Safety Audit Procedure From Start to Finish
Bringing the stages together gives you a repeatable procedure:
- Agree the objective, scope and schedule, and assign a competent lead auditor.
- Review the site paperwork and open actions from previous audits.
- Prepare a checklist organised by work activity.
- Walk the site, identify hazards and check controls.
- Inspect equipment and facilities, and interview workers and subcontractors.
- Score each finding and write the report with specific actions and owners.
- Agree the actions with the site team and set deadlines.
- Track actions to closure and run a follow-up inspection.
Run the procedure the same way each time. Consistency turns audits from a one-off exercise into a measure of progress.
Above all, keep the focus on fixing what you find. An audit that produces a long list of findings and no closed actions has achieved very little.
Booking Your Team's Site-Ready Workwear After the Audit
Once the audit has identified gaps in visibility or protection, the next step is often replacing non-compliant clothing. EG Clothing is a UK workwear provider offering in-house embroidery and print, UK stock and trade pricing. Our team can help you choose high-visibility and protective gear that suits the findings from your audit.
For example, the [PAGE:1] explains whether visitors to your site must wear it. You can also check the [PAGE:2] for worker visibility, and review the [PAGE:3] for crew protection. Once your actions are agreed, a [PAGE:4] can help keep logos and safety markings legible, and a [PAGE:5] suits workers of varying heights.
Frequently Asked Questions
How do you conduct a construction site safety audit?
Start with pre-audit planning: define the scope, review previous audit reports, site induction records and method statements, and build a checklist organised by work activity. Then walk the site with the relevant workers, identify hazards, inspect equipment, facilities and PPE, and interview operatives and subcontractors. Record each observation with photographs and a risk rating, then write the report and assign corrective actions with owners and deadlines. Schedule a follow-up inspection to confirm that actions have been completed.
What should a construction site safety audit include?
A thorough audit covers site access and welfare facilities, emergency exits and first aid provision, plant and machinery condition, working at height controls, excavation and lifting operations, and the use of personal protective equipment. It should also review written safe work procedures, training and competence records, and how the site communicates safety information to subcontractors. Compliance with the Construction (Design and Management) Regulations 2015 and the Management of Health and Safety at Work Regulations 1999 should be checked against the work being done on the day.
How often should construction sites be audited?
There is no single legal frequency for construction site safety audits in the UK. Most firms audit at least monthly for active sites, with additional audits at key stages such as groundworks, structural works and handover. Higher-risk projects or sites with a history of incidents may need weekly inspections. Your risk assessment and the project's health and safety plan should set the schedule, and the frequency should increase after any significant change in work activity or workforce.
What is the difference between a safety inspection and a safety audit?
A safety inspection is a targeted check of a specific area, item or activity, usually carried out by a supervisor to spot immediate hazards. A safety audit is broader and more systematic: it assesses whether the site's management systems, procedures and controls are working as intended. Audits review documents, records and processes as well as the physical site, and they usually produce a formal report with scored findings and an action plan.
Our trade pricing and fast turnaround make it easier to replace gear without delaying work. Start branding your team's workwear with EG Clothing and get kitted out to the standard your audit requires.
